> San Antonio Local Insight: Pipe problems in San Antonio are driven by hard water corrosion from the Edwards Aquifer (357 mg/L). High calcium content eats through copper from inside, causes pinhole leaks, and builds deposits that restrict flow. local plumbers increasingly recommend PEX over copper for repiping because it resists mineral corrosion.
Local Diagnosis Before You Start
Outdoor insulation in Bexar County has to handle two very different stresses: long UV exposure and the occasional hard freeze. In Westover Hills and Alamo Ranch, exposed irrigation and hose-bib runs can bake through summer, then split during a cold snap if the insulation is open at a seam. Before buying material, identify the pipe, measure its outside diameter, and budget about $25-$80 for a small DIY weatherproofing job; replacing a burst exposed section can start around $250 and rise quickly if a wall or slab is involved.
The Edwards Aquifer supplies water at about 357 mg/L, or 21 gpg, so scale can narrow small passages, stiffen valves, and disguise the real fault. SAWS notices can help rule out utility work when the whole property changes at once. Winter Storm Uri also showed why freeze history matters: a pipe can remain weakened long after thawing. Document the pattern and keep DIY work to visible, reversible checks.
Start With the Exposure, Not the Insulation Label
Outdoor water lines face a harder job than pipes inside a conditioned home. They must withstand cold air, wind, sunlight, rain, condensation, and sometimes impact from tools or yard equipment. The best pipe insulation for outdoors is therefore not simply the product with the highest advertised thermal value. It is a closed-cell material sized correctly for the pipe, sealed against moisture, protected from ultraviolet light, and paired with freeze-prevention measures appropriate to the climate.
For many exposed residential water lines, UV-rated elastomeric rubber is the most durable all-around choice. Closed-cell polyethylene foam can be a practical lower-cost option when it is covered by a weatherproof jacket. Fiberglass can perform well on larger or hot pipes, but only inside a properly sealed outdoor cladding system. Insulation slows heat loss; it does not create heat, so a long cold spell can still freeze a stagnant line.
Start With the Pipe, Climate, and Exposure
Identify what the line carries before buying anything. A cold-water supply, hot-water line, irrigation riser, condensate drain, and refrigerant line have different temperature and moisture conditions. Confirm the pipe's outside diameter rather than choosing insulation from the nominal pipe size alone. A loose sleeve leaves air gaps that encourage heat loss and condensation, while an undersized sleeve may split at the seam.
Then assess the actual exposure. A pipe against a sheltered wall in a mild climate needs less protection than a line under a windy raised deck where temperatures remain below freezing for days. Note direct sun, wind, roof runoff, soil contact, and vulnerable valves or elbows. If the line has frozen before, insulation alone may not address poor routing, an unsealed wall penetration, or a section that should be relocated into conditioned space.
How Outdoor Insulation Materials Compare
The useful distinctions are moisture resistance, temperature range, durability, and how easily the joints can be sealed. Product specifications matter more than color or appearance. Look for an explicit outdoor-use rating and follow the manufacturer's limits for service temperature, UV exposure, adhesive, and protective coating.
| Material | Best use outdoors | Main advantage | Main limitation |
|---|---|---|---|
| Elastomeric rubber | Water, HVAC, and refrigerant lines | Flexible closed-cell structure and strong condensation control | Costs more and may still require UV coating |
| Polyethylene foam | Budget water-line projects in sheltered locations | Easy to cut, widely available, and moisture resistant | Deteriorates in sun unless jacketed |
| Fiberglass with sealed cladding | Larger hot pipes and professional systems | Good thermal performance over a wide temperature range | Wet fiberglass loses performance; every seam needs weatherproofing |
| Rigid foam sections | Straight, larger-diameter industrial-style runs | High insulation value and firm shape | Awkward at residential elbows and easy to damage without cladding |
| Heat cable plus compatible insulation | Freeze-prone lines where approved | Adds controlled heat instead of only slowing heat loss | Requires listed components, power, inspection, and careful installation |
No material is weatherproof merely because it is closed-cell. Water can enter through open seams and terminations, and sunlight can make some foams brittle. A complete system includes compatible adhesive or tape, sealed ends, and a jacket or coating where the manufacturer requires one.
Best Overall: UV-Protected Elastomeric Rubber
Flexible elastomeric insulation is often the strongest choice for outdoor residential lines because its closed-cell structure resists water vapor and wraps neatly around bends. It is especially useful where condensation is likely, such as cold-water or HVAC suction lines. Choose wall thickness based on climate and the product's published application table, not on guesswork. Thicker is not helpful if seams remain open or fittings are bare.
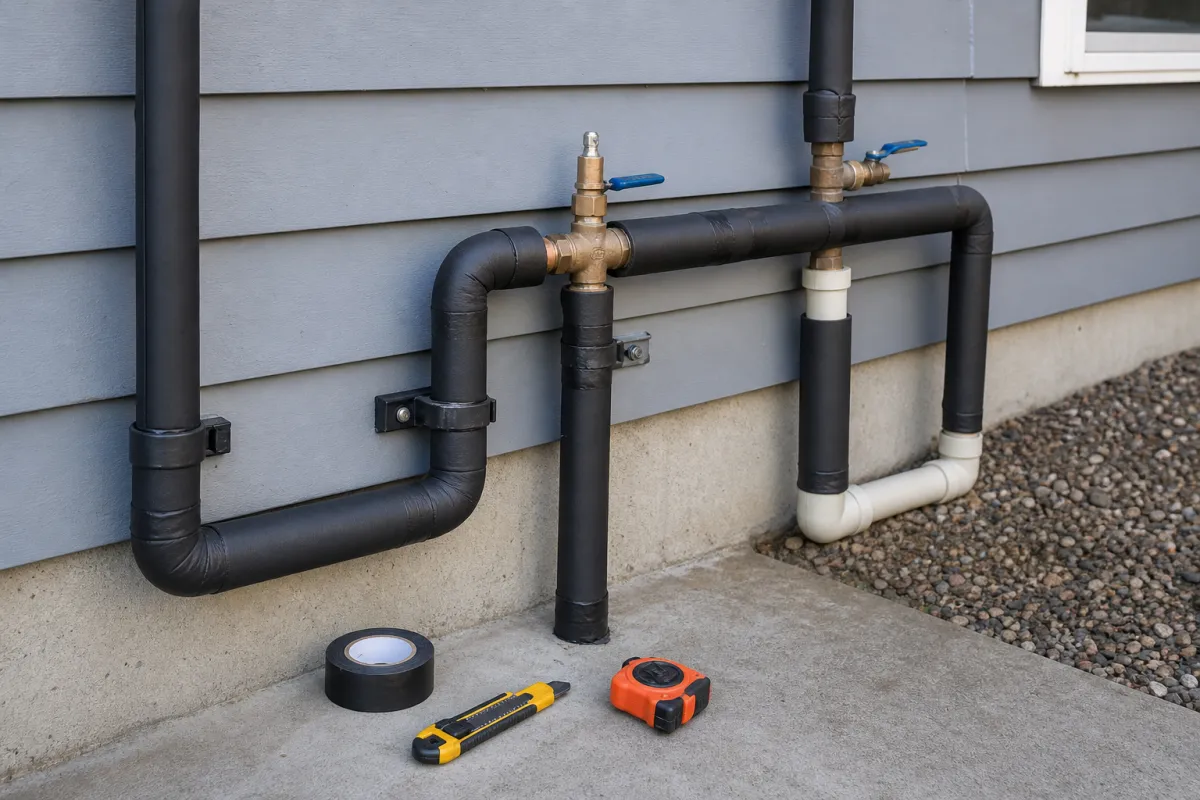
Standard black elastomeric foam is not automatically suitable for years of full sun. Some versions carry an outdoor UV rating; others require a compatible protective coating or jacket. Seal longitudinal seams and butt joints with the specified contact adhesive or tape, and coat exposed surfaces according to the instructions. At valves, use removable insulated covers when access is needed rather than burying operating handles under improvised foam and tape.
Best Budget Choice: Jacketed Polyethylene Foam
Pre-slit polyethylene sleeves can be economical for ordinary water pipes in sheltered outdoor areas. They are simple to measure and cut, and the closed-cell foam does not readily absorb bulk water. Select sleeves whose inside diameter closely matches the pipe, stagger joints where practical, and fit elbow pieces without crushing the foam. Products with self-sealing seams save time, but the seam still needs clean, dry surfaces and firm pressure.
Bare polyethylene should not be treated as a permanent exterior finish unless its label specifically permits that exposure. Use the manufacturer's weather-resistant jacket, rigid cover, or approved UV coating. Seal the jacket so rain sheds over laps rather than running into them, but do not use an incompatible solvent adhesive that could dissolve the foam. This option works best where the pipe is physically protected and severe freeze events are uncommon or addressed separately.
When Fiberglass Is the Better System
Fiberglass pipe insulation can be effective around hot-water lines, larger diameters, and high-temperature applications that exceed a foam product's rating. Outdoors, however, fiberglass is only the thermal layer. It needs continuous weatherproof cladding—often PVC or metal—with sealed longitudinal joints, overlaps, fittings, and end caps. A torn jacket can admit water and undermine the entire assembly.
This is less forgiving as a casual DIY project. Elbows, tees, valves, and wall penetrations require molded covers or carefully fabricated sections. The outer jacket must shed water without trapping it against metal pipe, and exposed metal systems may need corrosion control. For a short domestic line, elastomeric insulation is usually simpler. For a boiler line, commercial hot-water loop, or complicated large pipe, a mechanical-insulation contractor can specify the safer assembly.
Insulation Thickness and Fit Matter
A thicker insulation wall generally slows heat transfer better, but required thickness depends on pipe temperature, outdoor design conditions, wind, and the material's thermal conductivity. Use local energy or plumbing requirements and the manufacturer's sizing chart. In a cold region, the thinnest sleeve on the hardware-store shelf may be intended for condensation control, not freeze protection.
Fit is equally important. Measure straight runs, count fittings, and buy extra material for mistakes. Each gap becomes a thermal bridge. Cut sleeves square with a sharp insulation knife on a stable surface, dry-fit them, then seal according to the system instructions. At hangers, avoid compressing soft insulation to a fraction of its thickness; use appropriate insulated supports. Do not cover pipe identification, shutoff access, leak evidence, or safety valves that must remain visible.
A Safe Installation Sequence
Work on a dry day and correct active leaks before insulating. Shut off the water if work near a vulnerable fitting could disturb it, and know where the main shutoff is. Clean dirt and oil from the pipe, allow it to dry, and inspect for corrosion, cracks, bulges, or freeze damage. Insulation hides the surface, so unresolved defects can leak unnoticed later.
1. Measure the pipe's outside diameter and every straight section.
2. Verify that the insulation, adhesive, jacket, and tape are compatible and outdoor rated.
3. Fit straight sleeves without stretching them.
4. Miter or use formed pieces at elbows and tees; do not leave bare wedges.
5. Seal longitudinal seams, butt joints, and terminations.
6. Apply the approved UV or weather jacket with water-shedding overlaps.
7. Restore labels and access around shutoffs, drains, and service points.
8. Inspect after the first heavy rain and at the start of each cold season.
Keep insulation away from hot exhaust vents and other surfaces unless its temperature and clearance rating explicitly permits the location. If a pipe is near electrical equipment, do not work in wet conditions; have unsafe wiring or damaged enclosures corrected first.
Freeze Protection Requires More Than Insulation
Insulation delays freezing but cannot keep stationary water warm indefinitely. In sustained subfreezing weather, protect vulnerable plumbing by draining seasonal lines, closing and draining hose bib branches where designed for it, sealing cold-air leaks around penetrations, or relocating the line. A frost-free sillcock only works as intended when installed with the correct slope and with the hose removed.
Listed self-regulating heat cable can be useful on certain water pipes, but only when the cable is approved for the pipe material and installation. Follow instructions for overlap, thermostat placement, grounding, and insulation thickness. Never use an extension cord as permanent outdoor wiring, wrap ordinary heating wire around plumbing, or place combustible insulation over a cable that forbids it. A licensed electrician should provide a code-compliant weather-resistant receptacle and ground-fault protection where required.
Common Buying and Installation Mistakes
The most common purchasing mistake is choosing by price per foot without pricing the full system. Adhesive, fitting covers, UV coating, jacket, supports, and heat cable can cost as much as the sleeves. Mixing products from unrelated systems can also create failed seams or chemical incompatibility. Read the technical sheet before opening packages so unsuitable material can be returned.
Installation shortcuts are just as costly. Do not wrap outdoor pipe in towels, newspaper, or absorbent fabric; these hold water and can freeze. Ordinary duct tape soon degrades outdoors and is not a weather jacket. Do not pack insulation around a leaking fitting or assume a frozen pipe is safe because it has thawed. A split may not leak until full pressure returns. Avoid open flames and torches when thawing; concealed combustible materials can ignite.
Maintenance and When to Escalate Beyond DIYfessional
Inspect outdoor insulation at least seasonally and after storms, construction, or animal damage. Look for chalking, cracks, open seams, crushed sections, loose jackets, and green or rust-colored staining that may signal a leak. Repair with components approved for the original system. If water has entered fiberglass, replacement is usually more dependable than taping over a wet section.
Call a plumber when a line repeatedly freezes, has damaged fittings, supplies a critical fixture, or cannot be isolated safely. Bring in an HVAC technician for refrigerant lines because poor insulation can affect performance and hidden refrigerant problems are not a DIY repair. Use a licensed electrician for new outdoor power or questionable heat-cable circuits. Gas piping, fuel lines, fire-suppression piping, and backflow assemblies should not be modified or concealed based on general water-pipe advice.
FAQ
Will pipe insulation stop an outdoor pipe from freezing?
It slows heat loss and can protect through a short temperature dip, but it cannot guarantee protection during a long freeze. Drain the line, add an approved heat source, or reroute it when climate and exposure demand more protection.
Is rubber or foam insulation better outside?
UV-rated elastomeric rubber is generally more durable and easier to seal around fittings. Polyethylene foam can be effective and less expensive when it has a compatible weatherproof, UV-resistant cover.
Can I put heat tape under pipe insulation?
Only if both products explicitly allow that combination. Use listed heat cable sized for the pipe, follow overlap and thermostat rules, and connect it to a compliant protected circuit—never an improvised extension setup.
How often should outdoor pipe insulation be replaced?
There is no universal interval. Replace it when it becomes brittle, split, wet, crushed, detached, or UV-damaged. A seasonal inspection catches small jacket failures before the thermal layer deteriorates.
Should outdoor faucets be wrapped all winter?
A fitted insulated cover can reduce short-term heat loss, but remove hoses and drain or isolate the branch if the plumbing design provides for it. Repeated freezing calls for a plumbing assessment, not additional makeshift wrapping.
Why This Is Different in San Antonio
San Antonio's Edwards Aquifer supplies some of the hardest municipal water in the United States: about 357 mg/L, or 21 grains per gallon. That limestone-filtered groundwater carries calcium carbonate and magnesium into our fixtures, valves, drains, heaters, and supply lines. For best pipe insulation for outdoors, that matters because scale, corrosion, and age-related pipe weakness combine with slab foundations and older neighborhood plumbing materials.
- Scale buildup makes small restrictions worse, especially at cartridges, aerators, shutoff valves, drains, and heater connections.
- Fixtures, pipes, and appliances in our area can wear out 30-50% faster than in soft-water cities when maintenance is delayed.
- SAWS publishes annual water quality reports, but the practical homeowner takeaway is simple: maintenance intervals here should be shorter than national advice suggests.
Homes in Westover Hills and Alamo Ranch are particularly affected because newer PEX-heavy construction still sees fixture wear from 21 gpg hard water. Unlike cities with naturally soft water, local homeowners should treat hard-water maintenance as normal prevention, not an upsell.
> "When I see early leaks in San Antonio, I always look for hard-water scale, corrosion, and older neighborhood pipe materials before blaming one bad fixture." — Licensed local plumber
What San Antonio Homeowners Pay (2026)
| Service | Typical Cost in San Antonio |
|---|---|
| Emergency plumber call | $150–$350; after hours $250–$500 |
| Whole house repipe (PEX) | $4,500–$9,000 |
| Slab leak repair | $2,000–$5,000 |
Prices are based on local metro area ranges for 2026. Costs may vary by neighborhood, access, pipe material, after-hours timing, and whether the plumber finds hard-water damage beyond the visible problem.
When to Call a San Antonio Plumber
Call a licensed local plumber if the problem involves active leaking, a shutoff valve that will not close, sewer smell, recurring clogs, water near electrical components, a water heater leak, or any pipe inside a wall, ceiling, or slab. Locally, expect many licensed plumbers to charge roughly $85-$150 per hour, with emergency visits commonly around $150-$350 and after-hours calls closer to $250-$500.
When you call, ask three local questions:
1. Are you licensed and insured for work in Bexar County or the surrounding local metro?
2. Have you dealt with Edwards Aquifer hard-water scale on this type of repair?
3. Should I also check the water heater, shutoff valves, or water softener while you are there?
local plumbers see hard-water issues every week, so a good pro should be able to explain whether the failure is normal wear, mineral damage, freeze damage from a cold snap like Winter Storm Uri, or a sign of a larger plumbing system problem.
San Antonio FAQ
Is San Antonio water hard?
Yes. San Antonio water is very hard at about 357 mg/L, or 21 grains per gallon, because much of it comes from the Edwards Aquifer and passes through limestone. That mineral content is why scale shows up quickly on faucets, showerheads, valves, drains, and water heaters.
Do local homes need a water softener?
A water softener is recommended for many local homes, especially if you see white scale, repeated faucet or valve problems, short water-heater life, or cloudy spots on dishes. A typical whole-home water softener installation in San Antonio runs about $1,500-$4,000.